
Stargazing at camp: night sky basics for campers
How to enjoy the night sky from a campsite: picking dark places and moon phases, letting your eyes adjust, using red light, what to look for with the naked eye and binoculars, staying warm and being considerate of other campers.
By the CampTier team · Updated 2026-10-15 · About 5 min read
Why camp is a great place to look up
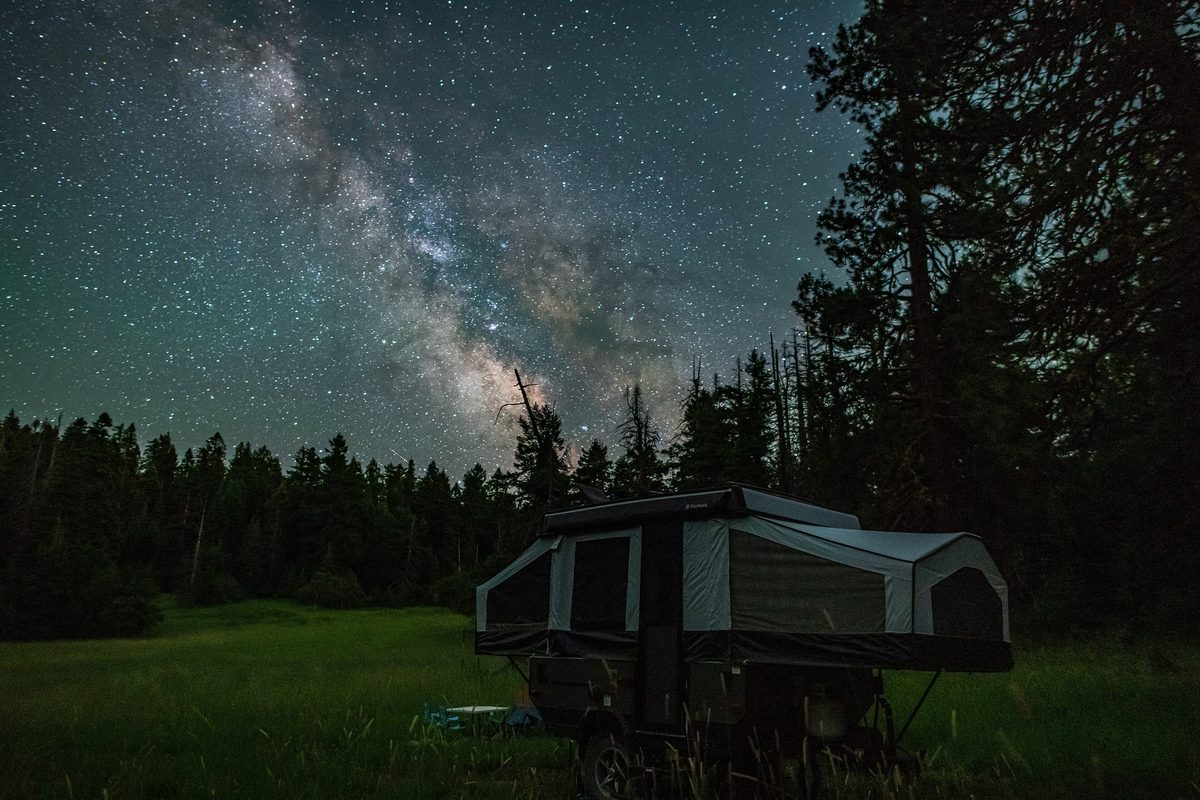
For many people, a camping trip is the first time they see a truly dark sky. Away from city lights, thousands of stars, the band of the Milky Way and the occasional meteor become visible with nothing more than your eyes. You do not need a telescope or any special knowledge to enjoy it. A little planning around location, moon phase and lighting makes a big difference. This guide covers the basics for campers who want to make the most of the night sky.
Find dark skies
Light pollution from towns and cities washes out faint stars, even many miles away. To see more:
- Choose remote campgrounds away from large towns where possible.
- Look for designated dark sky places. DarkSky International (formerly the International Dark-Sky Association) certifies parks and reserves that protect night skies, and many have campgrounds or ranger-led night programs.
- Use a light pollution map to compare locations before you book.
- Face away from glow. Even at a dark site, the horizon in the direction of the nearest town may be brighter.
Astronomers sometimes describe sky darkness with the Bortle scale, which runs from 1 for the darkest skies to 9 for inner-city skies. You do not need to know your number, but the scale is a handy way to compare sites.
Check the moon and weather
The moon is beautiful, but a bright moon washes out faint stars and the Milky Way. For the darkest skies, plan trips around the new moon, or watch after moonset or before moonrise. A moon phase calendar or app shows when the moon rises and sets each night.
Clear skies matter just as much. Check cloud cover forecasts, and remember that haze, humidity and wildfire smoke can dim the view.
Let your eyes adjust
Your eyes need time to adapt to darkness. It commonly takes around 20 to 30 minutes for night vision to develop well, and a single look at a bright phone screen or white light can reset much of that progress. Tips:
- Turn off lanterns and headlamps for a while before you start looking.
- Dim your phone screen fully or use a red-screen mode if your phone has one.
- Use averted vision for faint objects by looking slightly to the side of them, since the edges of your vision are more sensitive in low light.
Use red light
Red light affects night vision less than white light, which is why many headlamps include a red mode. Use it for walking around camp, reading star charts and finding gear. Our guide to how to choose a headlamp explains headlamp modes, and campsite lighting plan covers keeping camp lighting low and warm.
What to look for with your eyes
- The Milky Way: from dark sites in the Northern Hemisphere, the brightest part of the Milky Way is best seen on summer evenings, while a fainter band is visible at other times of year.
- Constellations: start with easy patterns, such as the Big Dipper in the northern sky, and use them to find others.
- Planets: bright points that appear along the same path as the sun and moon. Planets often shine more steadily than stars, which tend to twinkle.
- Meteors: shooting stars can appear on any night, and annual meteor showers bring more. The Perseids peak around mid-August and the Geminids around mid-December.
- Satellites and the space station: steady moving points of light, often seen in the first hours after dusk. NASA's Spot the Station service lists visible International Space Station passes.
Binoculars and simple tools
Binoculars are an underrated stargazing tool. They show many more stars, the craters of the moon and some star clusters, and they are easy to carry. Binoculars around 7x50 or 10x50 are commonly suggested for astronomy because the large lenses gather more light, though any pair you already own is worth trying. Resting your elbows on a chair or lying back helps keep the view steady. Our guide to choosing camp binoculars for day hikes covers magnification and lens size.
Other helpful tools:
- A planisphere (rotating star chart) or a star chart app with a red night mode
- A reclining camp chair or a pad and sleeping bag to lie on
- A notebook for logging what you see
Stay warm and comfortable
Even summer nights can feel cold when you sit still for an hour. Bring an extra warm layer, a hat and a blanket or sleeping bag. Hot drinks in an insulated bottle help. See layering for camping for the basics.
Stay safe in the dark
- Pick your viewing spot in daylight so you know where the hazards are, such as drop-offs, roots, water or guylines.
- Stay close to camp unless you know the area well. If you walk to a viewpoint, follow the habits in night hiking with a headlamp.
- Keep food stored properly, since wildlife is active at night.
- Tell your group where you are going and carry a light, even if you plan to keep it off.
Be a good neighbor
Dark skies are shared. Keep lanterns low and pointed down, switch off bright lights when you do not need them and avoid shining headlamps toward other campsites. Respect quiet hours and keep voices low late at night. Some campgrounds and dark sky parks have specific lighting rules, so check before you go. A warm, dim camping lantern on a low setting keeps camp usable without spoiling the view.
Photographing the night sky
Phones and cameras can capture surprising night sky photos with a tripod and a long exposure or night mode. Keep the screen dim, and be considerate of other stargazers when using lights to set up shots.
A simple stargazing plan
- Check the moon phase and cloud forecast before the trip.
- Choose a dark campsite and scout a viewing spot in daylight.
- Pack a red light, extra layers and something comfortable to lie on.
- Turn off lights and give your eyes 20 to 30 minutes.
- Start with easy targets, then explore with binoculars.
Bottom line
Great stargazing at camp comes down to dark skies, a cooperative moon and patient eyes. Choose remote sites, plan around the new moon, use red light, stay warm and keep camp lighting low for everyone. You need nothing more than your eyes to start, and a pair of binoculars opens up even more.
Filter lighting by spec → Compare up to 3 →
Related guides
- Campsite Lighting: A Simple Plan for Safe, Comfortable Nights
- How to Choose a Headlamp for Camping
- Choosing camp binoculars for day hikes
- Night Hiking with a Headlamp
- How to Layer Clothing for Camping
General guidance from CampTier, based on manufacturer instructions and common outdoor practice. We don’t claim hands-on testing. Always follow your gear maker’s care and safety instructions. See our safety notes.