
Hiking on icy trails with traction devices
How to hike safely on icy and packed-snow trails: when you need traction, the differences between studded slip-ons, chain-and-spike traction and crampons, fitting them to your boots, walking technique, poles, recognizing hazards, turning back, and drying and storing traction devices.
By the CampTier team · Updated 2026-10-15 · About 5 min read
Why ice deserves respect
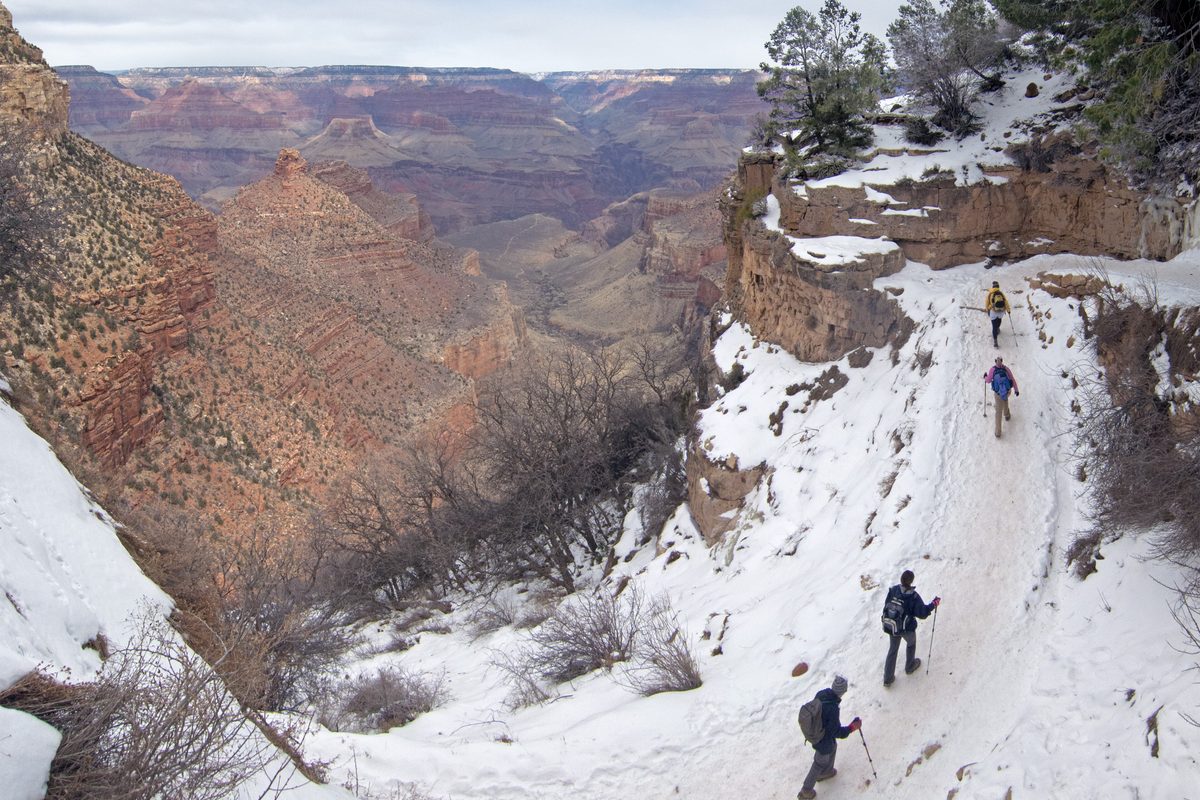
Many winter hikes are not deep powder adventures but walks on hard-packed snow and ice. Popular trails freeze into slick ribbons as hikers compact the snow, meltwater refreezes overnight and shaded sections stay icy long after sunny stretches have cleared. Slips on ice cause plenty of sprained wrists, twisted knees and worse. A pair of slip-on traction devices, worn at the right time, makes these trails far safer and more enjoyable.
This guide covers the main types of traction, how to fit and use them, and how to judge when conditions are beyond your gear or skills. It is general guidance, so check trail conditions with the land manager before you go and follow the instructions for your devices.
When you need traction
Consider traction whenever a trail is icy or covered in firm, packed snow, especially on slopes, stairs, bridges and shaded sections. Clues that you will want it include:
- Recent freeze-thaw cycles, when daytime melt refreezes overnight
- Popular trails after snowfall, which pack down into slick surfaces
- Shaded north-facing sections and canyon walls that rarely see sun
- Trail reports or park alerts that mention ice. Some parks, including Grand Canyon in winter, recommend over-the-shoe traction for upper trail sections.
Put traction on before you reach the slippery section, not after your first fall. It is much easier to do on flat ground than on a steep, icy slope.
Types of traction devices
Studded or coil slip-ons. These have small studs or metal coils on a rubber frame. They are light, inexpensive and good for icy sidewalks, parking lots and flat or gently sloping trails. They give less grip on steep or uneven terrain.
Chain-and-spike traction. Often called microspikes, these have short spikes, usually around half an inch or so, connected by chains to a stretchy rubber harness. They are popular for winter hiking on packed snow and ice on moderate trails, grip well on varied terrain and pull on over most hiking boots.
Crampons. Crampons have longer, stronger points and attach with straps or bindings to stiff boots. They are designed for steep snow and ice in mountaineering terrain and are usually used with an ice axe. Using them safely takes training, since the long points can catch on clothing or the opposite leg. If a route calls for crampons, consider a course or a guided trip first.
For most winter day hikes on established trails, chain-and-spike traction is the common middle ground. In deep, soft snow, snowshoes usually work better than spikes; see snowshoeing basics for winter hikes.
Fitting traction to your boots
Traction devices come in sizes matched to boot sizes. Try them on with the boots you will actually wear, since bulky winter boots may need a larger size than trail runners. A good fit:
- Stays centered under the sole, with spikes under the ball and heel of the foot
- Does not slide around when you walk or twist your foot
- Pulls on without heroic effort, even with gloves on
Practice putting them on and taking them off at home. Cold fingers and a steep trail are not the place to learn. Sturdy, waterproof boots with some insulation pair well with traction in winter; see waterproof hiking boots and choosing hiking footwear.
Walking on ice with traction
Traction helps a lot, but technique still matters:
- Walk flat-footed so all the spikes engage, rather than rolling from heel to toe.
- Take shorter steps and keep your weight over your feet.
- Go slower on descents, keeping your knees slightly bent.
- Watch for rocks, roots and bare patches, where spikes can skate or catch.
- Lift your feet slightly more than usual so spikes do not snag on the opposite leg or gaiter.
Remove traction when you reach long sections of bare rock or pavement. Walking on hard surfaces dulls the spikes and can feel unstable.
Poles and other winter gear
Trekking poles add two more points of contact on slippery ground. Carbide tips grip ice better than rubber tip covers, and snow baskets keep poles from sinking into soft snow beside the trail; see choosing trekking pole tips and baskets. Gaiters keep snow out of your boots and protect your pants from spikes; see choosing gaiters for hiking.
Pack warm layers, a headlamp and a map, since winter days are short and stops get cold quickly. See layering for camping.
Know when to turn back
Traction devices are not a license for every icy slope. Turn around or choose another route if:
- The trail crosses steep, exposed snow or ice where a slip could become a long slide.
- You meet water ice, such as frozen waterfalls or flows across the trail, that your traction does not bite into firmly.
- Conditions are deteriorating, with freezing rain, failing light or a group member who is struggling.
- The route needs crampons, an ice axe or avalanche skills that you do not have.
Frozen lakes and streams deserve special caution. Ice thickness can vary widely, and moving water underneath can weaken it, so stay off unless local authorities confirm it is safe.
Choosing a first icy trail
For your first outings with traction, pick a familiar, well-traveled trail with gentle grades and an easy turnaround point. Short loops near a trailhead let you get used to how spikes feel and adjust the fit without committing to a long day. Check recent trip reports or call the ranger station, since conditions can change from week to week. Morning hikes often meet firmer, icier surfaces, while afternoons on sunny slopes can turn to slush and mud.
Kids and dogs on icy trails
Children's traction devices exist for smaller boots, and an adult should check the fit before each hike. Keep the pace slow, hold hands on steep or slick sections and choose shorter routes. Dogs have natural traction, but ice can cut paw pads and ice balls can form between toes. Check paws during breaks, consider booties if your dog tolerates them and keep dogs leashed near drop-offs and frozen water.
After the hike
Rinse off grit and salt if needed, then dry traction devices fully before storing them to prevent rust. Check for bent or missing spikes, worn chains and stretched or cracked rubber. Keep them in a small bag so spikes do not puncture other gear, and take them off before going indoors, since spikes damage floors.
Bottom line
On icy, packed winter trails, slip-on traction is one of the simplest safety upgrades you can make. Choose studded slip-ons for flat ice, chain-and-spike traction for most winter hiking and crampons only with training. Fit them to your boots, put them on early, walk flat-footed and turn back when conditions go beyond your gear or skills.
Filter hiking boots by spec → Compare up to 3 →
Related guides
- Snowshoeing basics for winter hikes
- Choosing Hiking Footwear: Boots, Mid Hikers and Trail Shoes
- Waterproof Hiking Boots: Membranes, Leather and When You Need Them
- Choosing Trekking Pole Tips and Baskets
- How to Choose Hiking Gaiters
General guidance from CampTier, based on manufacturer instructions and common outdoor practice. We don’t claim hands-on testing. Always follow your gear maker’s care and safety instructions. See our safety notes.